How to use CustomGlobalMarkup portlet to add image slider on every Liferay page
The original purpose of CustomGlobalMarkup portlet was to provide convenient interface for adding 3rd parties javascript code (like Google Analytics, Geminus, ClickTale, Crazy Egg, …) to every page. However since it allows to add any markup it can be used to do some other cool things. For example - image slideshows.
Image sliders are made of pure HTML + CSS +Javascript and usually don’t require any server side implementation. However I recently noticed a few posts on Liferay forums where people were asking about how to implement them in Liferay. One particular question was about how to add Image slider portlet on every portal page without modifying the theme. This inspired me to white about how CustomGlobalMarkup portlet can help achieve that. I’m not saying this is the best solution, nor that it will fulfill any requirement out there. I’m just sharing an idea with you, so please make sure you understand all pros and cons before you put this code in production.
OK, first things first! We need some image scroller so type the phrase in gooogle and examine the results. My search led me to
this page listing over 60 jQuery based image scrollers. I decided to go with s3slider and this is what I will use in the examples, but feel free to pick whichever fits your case better.
Installing s3Slider is as simple as:
- add the libraries (jQUery, s3Slider) to the page
- prepare the HTML structure (based on unordered list containing images and texts)
- add the CSS styles
- start the s3Slider
CustomGlobalMarkup can do all of these. First of all, create new markup and add this snippet:
This is something we would like to have in the head so make sure “Location” is TOP: 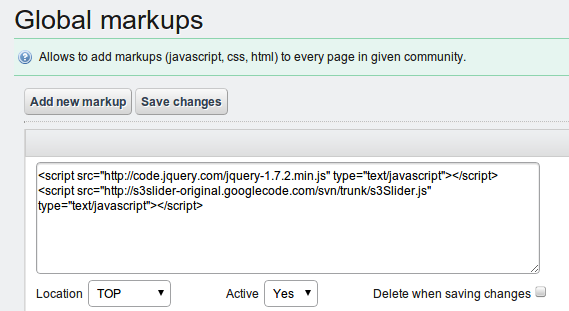
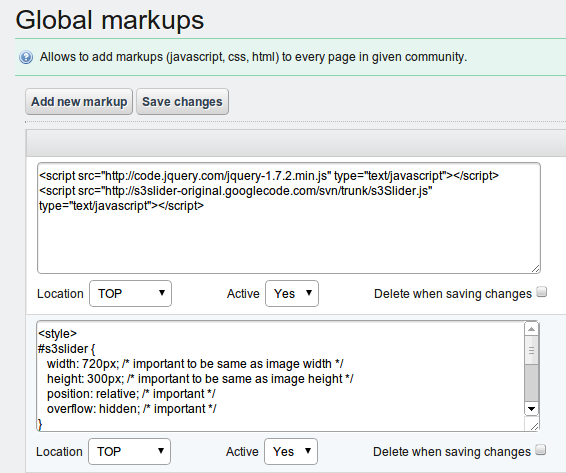
Then add another markup for the CSS:
Pay attention that styles contain width and height attributes you need to adjust according to the size of the images you use. You may also change text color, background, location, … When you are done save it and make sure Location says TOP:
You can join the above snippets into simple markup entry if you prefer. I keep them separately because it’s more convenient to disable/enable small pieces.
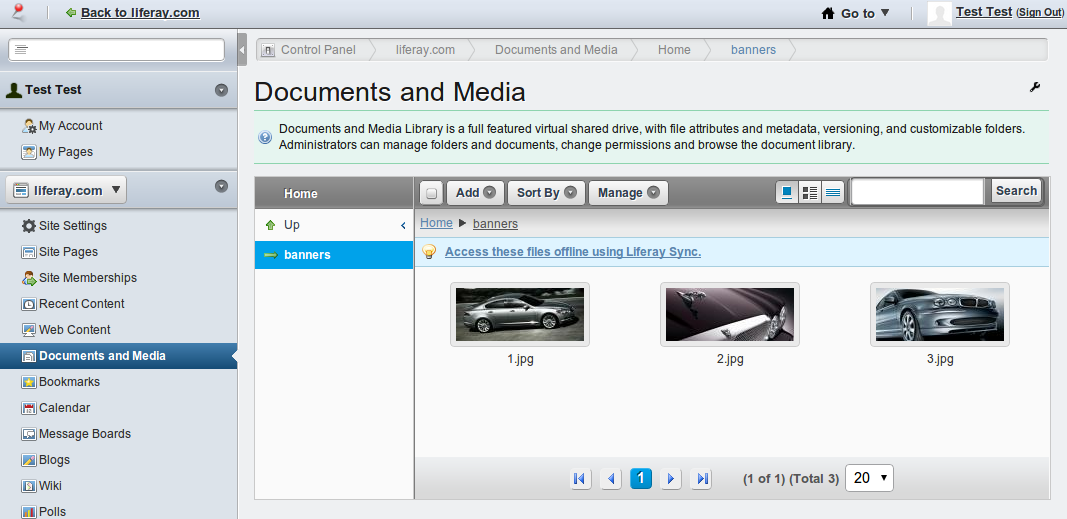
Before we add the HTML code and start s3Slider we need some images. If you already have have images publicly available then you can skip this step and simply adjust the URLs in the next snipped accordingly. Otherwise, upload your images to Liferay’s Document Library and note their addresses:
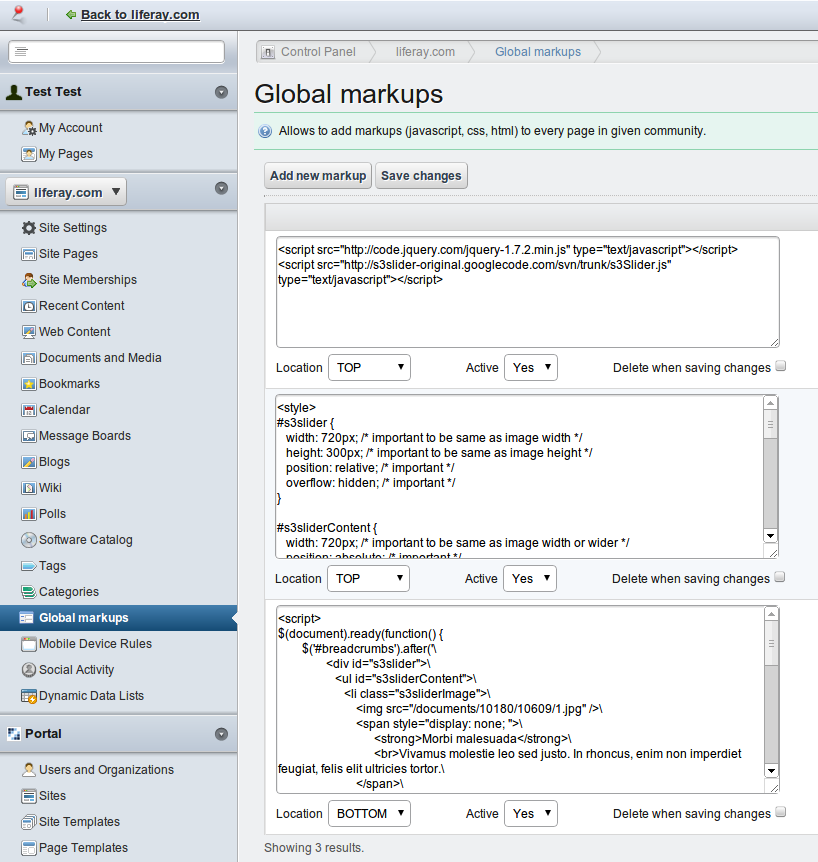
Now create the last markup entry and fill it with this code:
The first statement in the ready function looks for breadcrumbs element and inserts the HTML structure required to display the slideshow, right after it. In your theme you may use other HTML element or another script altogether to add the content. You will also need to provide the image URL’s and texts to display. Of course you may add/remove li elements to change the number of slides.
The second statement uses the element added and starts s3Slider on it. So finally you should have something like this:
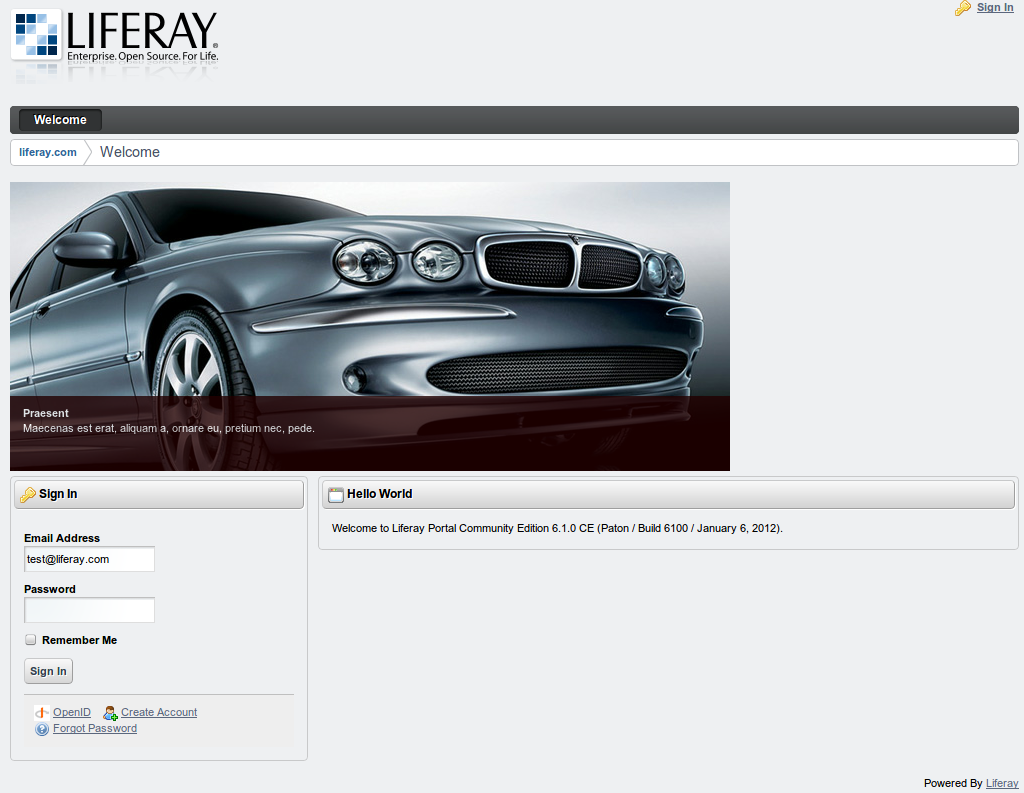
And that’s it. Save the markups and go back to the portal. You should see something like this:
You can install CustomGlobalMarkup from Liferay’s community plugins repository or download the latest version from here!